
Stores
A store is one of your locations. Your screens, content, Pages, and Designs all belong to a store, and so does each person’s access: a Store Manager or Store Viewer works only on the stores they’re assigned to.
The store picker at the top of every page switches which store you’re working on.
The store list
Section titled “The store list”Click Stores in the sidebar to open Store Management.
- The cards along the top count your stores — Total, Active, and Inactive — and the Displays across all of them. Needs Attention appears when a store is inactive, or is active with no screens.
- Search stores… finds a store by name. Brand and Status narrow the list.
- The buttons on the right switch between cards and a table. Cards are the default, and the list remembers your choice. On a phone it always shows cards.
Stores are grouped under their brand. Each card shows the store’s screens and content sources. The table adds a Users column, and the arrow beside each brand collapses its group.
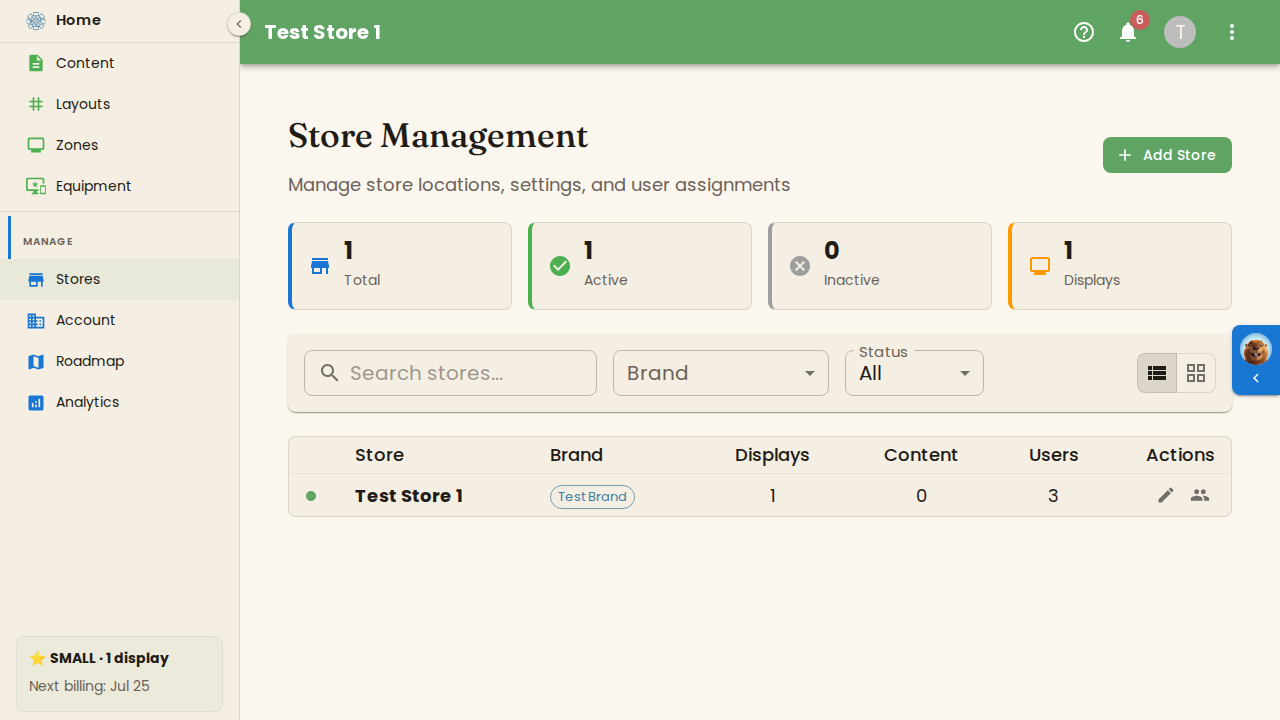
Click a store to open its page.
Add a store
Section titled “Add a store”Only the Account Owner can add stores. Free includes one location: on Free, creating a second store stops at Location limit reached, with an Upgrade button. See Plans and pricing.
Click Add Store. Store Setup walks you through six steps. Steps marked optional have a Skip button.
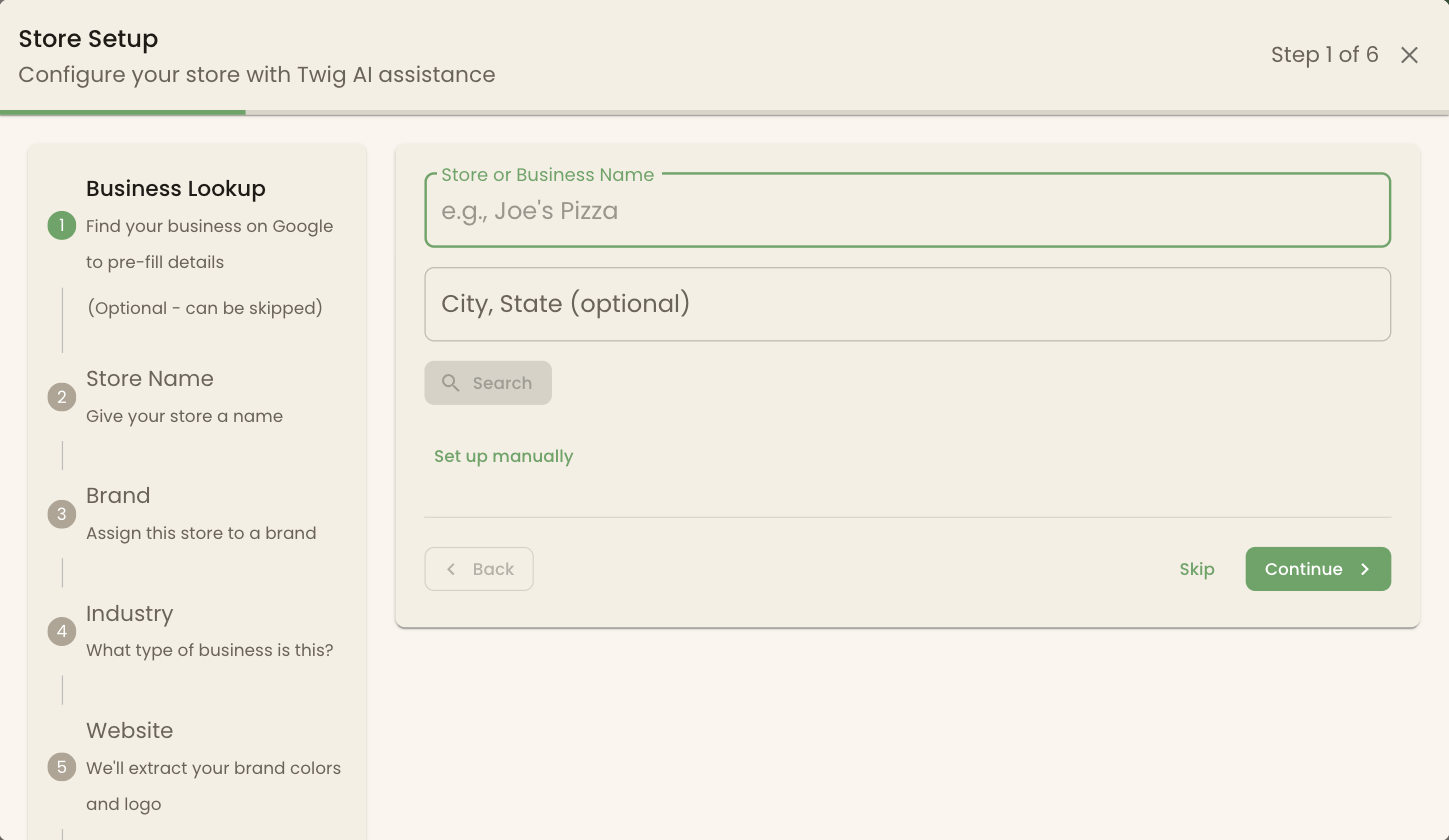
- Business Lookup (optional) — enter your Store or Business Name, and a City, State if you like, then click Search and pick your business. BrandCast fills in the name, address, phone, website, business type, and hours from its Google listing. Set up manually skips the search.
- Store Name — the name you’ll see in BrandCast, and an optional Description for your own reference.
- Brand (optional) — Twig reads the store name and suggests a brand. If an existing brand matches, pick it. Otherwise choose Create new brand, or Skip - don’t assign to a brand.
- Industry — Retail, Restaurant, Salon, Office, Studio, Fitness, Worship, Healthcare, or Other. BrandCast uses it to suggest hours and the topics it sorts your events into.
- Website (optional) — when you finish, BrandCast reads the site and fills the brand’s kit with its colors, fonts, logo, and tone.
- Hours (optional) — the Timezone, and each day’s opening and closing times. Apply suggested hours fills in typical hours for your industry. Night Mode uses these hours to dim or turn off screens while you’re closed.
Click Create Store.
To put a new store under a brand whose name doesn’t match the store’s, skip the Brand step, then use Brand → Change on the store’s page.
The store page
Section titled “The store page”The page title shows the store’s name and an Active or Inactive label. The back arrow returns to the list.
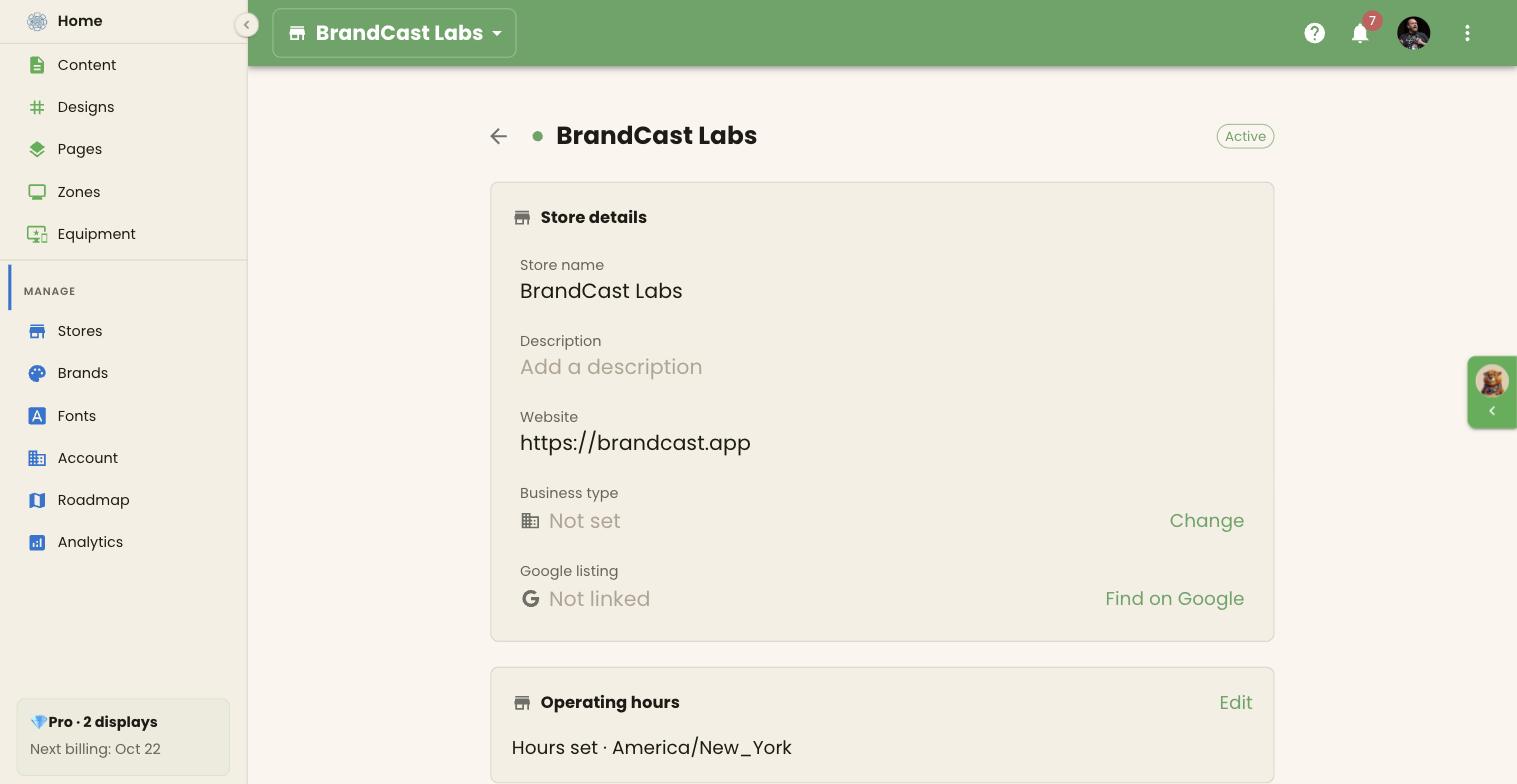
Only the Account Owner can change a store’s details. Everyone else sees them read-only.
| Section | What’s there |
|---|---|
| Store details | Store name, Description, Website, Business type, and Google listing |
| Operating hours | The weekly hours and timezone. Click Edit to change them |
| Address & contact | Address, City, State, Zip, Phone, and Email |
| Brand | The store’s brand. Click Change to pick another, or No Brand (Unassigned) |
| Usage | How many Displays, Content Sources, and Users the store has, and Manage users |
| Integrations | The store’s Google and Canva connections |
| Danger Zone | Delete Store |
To change a detail, click it, edit it, and press Enter or click away. The Description saves when you click away, so Enter starts a new line.
Google listing links the store to its Google Business listing, which Google Reviews content reads from. Click Find on Google, or Change to pick a different listing. See Google Reviews.
Integrations
Section titled “Integrations”OAuth Services lists Google Tasks, Canva, Google Photos, Google Docs, and Google Slides, each with Connect or Disconnect. Connections belong to the store, so a second store connects separately. The refresh button rechecks each connection. See Integrations overview.
Who can work on the store
Section titled “Who can work on the store”The Account Owner can work on every store. Store Managers and Store Viewers only see the stores they’re assigned to.
The Account Owner assigns people from Manage users in the Usage section:
- Assign New User — pick someone from your team, choose Manager or Viewer for this store, turn on Primary if they’re its main contact, and click Assign.
- Current Users — everyone assigned to the store. The bin removes someone from this store straight away; their account and their other stores aren’t affected.
A store keeps at least one primary manager, so you can’t remove the last one.
To add someone new to your team, use Account → Team. See Team management.
Delete a store
Section titled “Delete a store”Only the Account Owner can delete a store. At the bottom of the store’s page, expand Danger Zone and click Delete Store.
The dialog lists what the store holds — its screens, Pages, Library items, content sources, and users. Deleting the store deletes its screens, Pages, Library items, and content, and removes everyone’s access to it. Move anything you want to keep to another store first.
You can’t delete your account’s default store, or its only store.
Deleting a store can’t be undone.