
Your first content
Content is the live part of a screen: the weather, a clock, a slideshow, your calendar, a news feed. Each piece of content is a content source that BrandCast keeps up to date. It shows on a screen once you place it in an area of a Page.
Two ways to add content
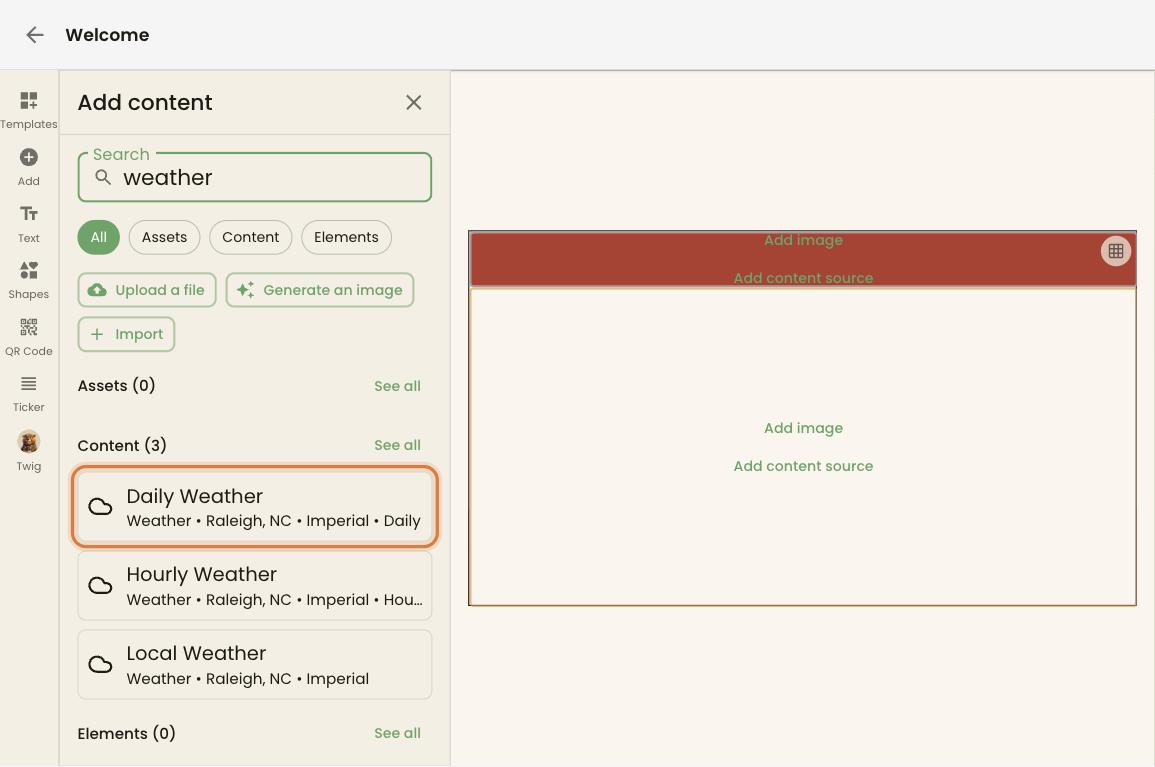
Section titled “Two ways to add content”From a Page. Click Add content source in an area. The Add content panel lists the sources you already have. Anything marked Set up is a type you haven’t connected yet. Click it and the panel walks you through setup, then places the new source in that area. This is the quickest route when you’re building a Page. The Quick start guide shows it step by step.
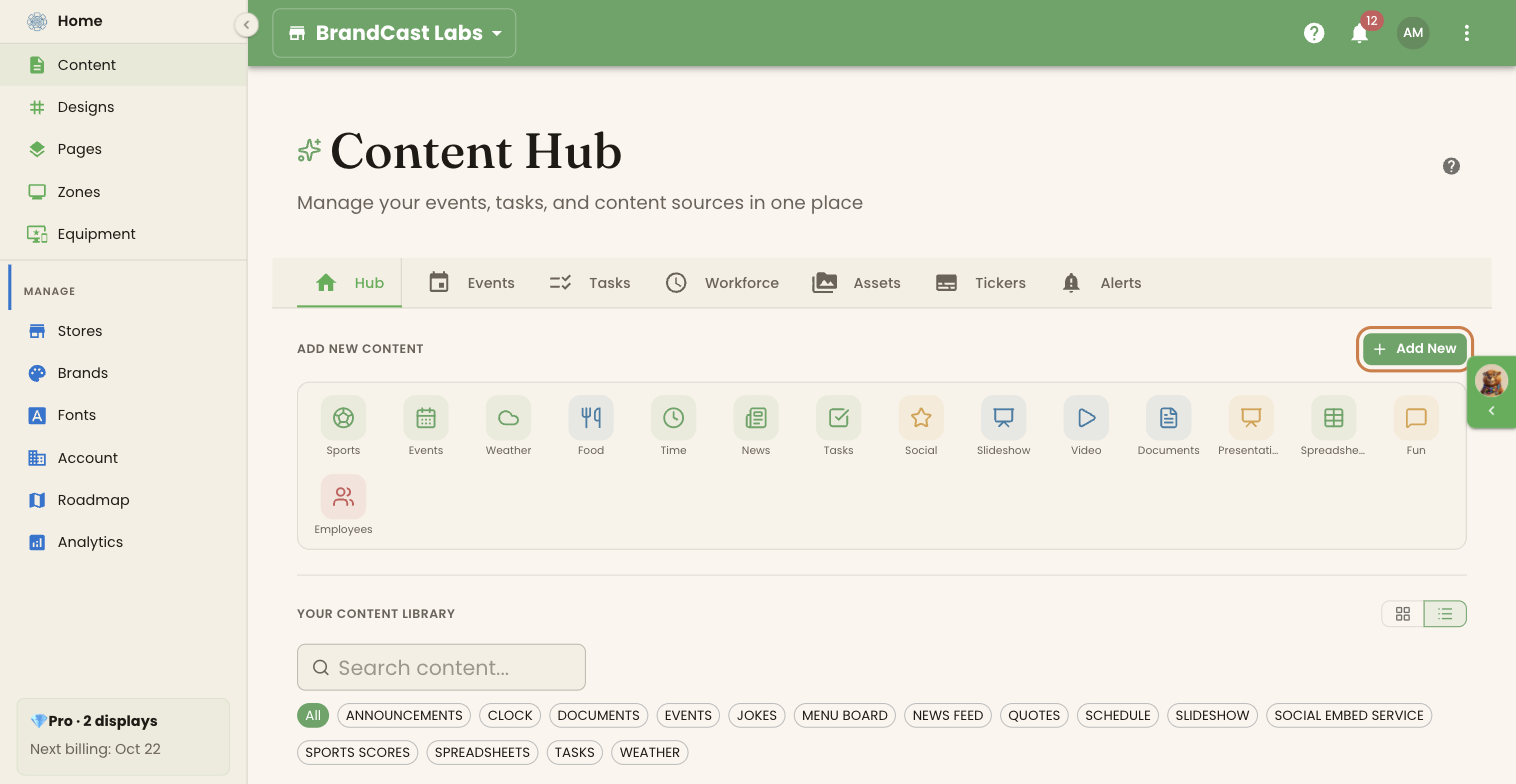
From the Content Hub. Click Content in the sidebar, then Add New.
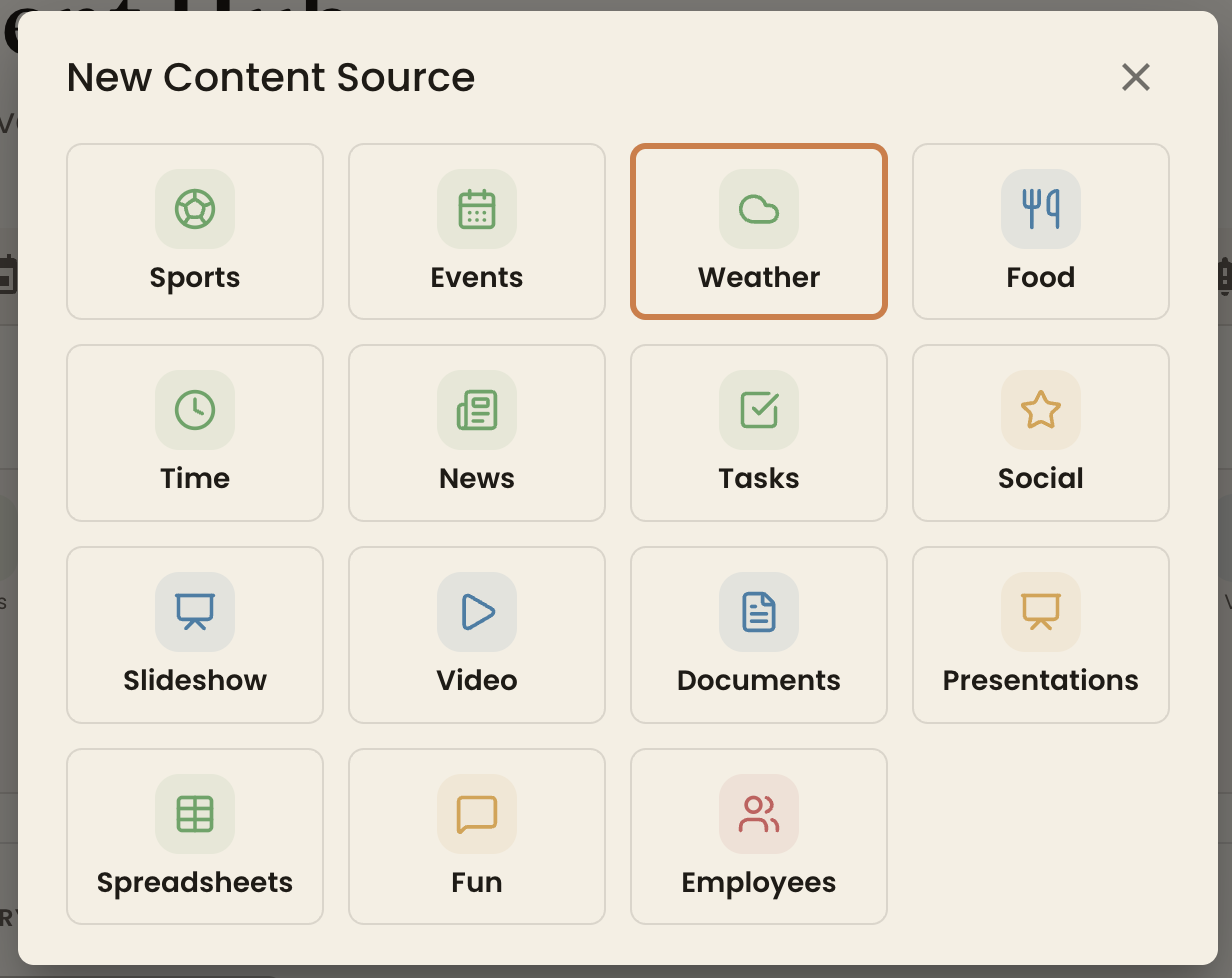
The New Content Source dialog shows every category. Pick one, fill in the Configure step, and click Create. The new source is saved to your library, ready to place in any Page.
The icons in the Add new content row open the same setup without the dialog, and finish with a step that adds the source to a Page.
Good first choices
Section titled “Good first choices”These need no accounts or files and look good on any screen.
Weather
Section titled “Weather”- Pick Weather. Give it a Name.
- Location starts with your store’s address. Change it to any city name, zip code, or coordinates, and choose the Units.
- Choose a Forecast Type:
- Current Conditions: today’s weather in full
- Icon Only: the temperature and an icon on a transparent background, to sit over an image
- Hourly Forecast: the next hours, with a slider for how many
- Daily Forecast: the coming days, with a slider for how many
- Click Next, then Create.
Pick Time, then Clock, Countdown Timer, or Count-Up Timer. A countdown suits a sale or an event. A count-up suits a milestone, such as days without an accident.
Slideshow
Section titled “Slideshow”- Pick Slideshow and click Add Items. Choose images or videos from your library, or switch the picker to Upload to add new ones.
- Put them in order with the Move up and Move down arrows.
- Under Slideshow Settings, set Image Duration (3–60 seconds) and Transition Duration (0–3 seconds).
Five to ten images is a good start.
Content that connects to your accounts
Section titled “Content that connects to your accounts”Events
Section titled “Events”Pick Events. Under Calendars, tick the calendars to show. The list holds the calendars you’ve synced on the Content Hub’s Events tab, plus Added in BrandCast for events you enter by hand. Then choose a View: Day, Agenda, Week, or Month.
Pick News. On the Sources step, choose topics such as Tech, Business, or Sports, or individual feeds. You can add a custom RSS feed, but you don’t need one. On the Display step, choose a Display Mode (Cards, Headlines, or Featured) and how many stories to show.
Your content library
Section titled “Your content library”The Content Hub’s Hub tab lists every source under Your content library.
- Type in Search content… to find a source by name, description, or type.
- Click a type chip, such as WEATHER or SLIDESHOW, to show only that type. All clears the filter.
- Switch between grid and table view with the buttons at the top right.
- Click a source to edit it. Each card also has Use in a Design, Duplicate, and Delete.
Content sources belong to a store. The library shows the store picked in the selector at the top of the screen, so switch stores there to see another location’s content.
Making content work on a screen
Section titled “Making content work on a screen”- Big and short. People glance at a screen from across the room. Use large text and a few words.
- High contrast. Light text on a dark background, or the reverse, reads best on a TV.
- Match the zone. A Welcome screen gets seconds of attention, so keep its Pages short. A waiting room can hold longer Pages. Each Page stays on screen for two minutes unless you change its duration in the Design.
- Images: 1920 × 1080 fills a landscape TV and 1080 × 1920 fills a portrait one.
- Videos: upload MP4, MOV, AVI, WMV, FLV, WebM, or MKV files up to 100 MB. BrandCast converts them for playback, so you don’t need to re-encode them first.
If something’s not right
Section titled “If something’s not right”The content isn’t on the screen. Check that the source is placed in an area of a Page, that a Design containing that Page is scheduled for the current time, and that the screen isn’t in night mode. In the Add content panel, a source marked Switched off or Not updating won’t show new information. Click Refresh content in the display’s Screen card to push the change straight away.
An image is cropped or has bars. Select the image area in the Page editor and change Image fit: Fill area crops the image to fill the area, and Fit whole image shows all of it.
A video won’t upload. It’s over 100 MB. Trim or compress it and try again.
A card shows a warning. The account behind that source has disconnected. Open the source and reconnect it.
What’s next
Section titled “What’s next”- Content types: every kind of content BrandCast can show
- Content Hub: the Events, Tasks, Assets and other tabs
- Design editor: arranging the areas of a Page
Want ideas for your business? Open Twig from the tab on the right edge of the screen and ask what content suits your zones.